Installation
Install via WordPress Plugin Repository
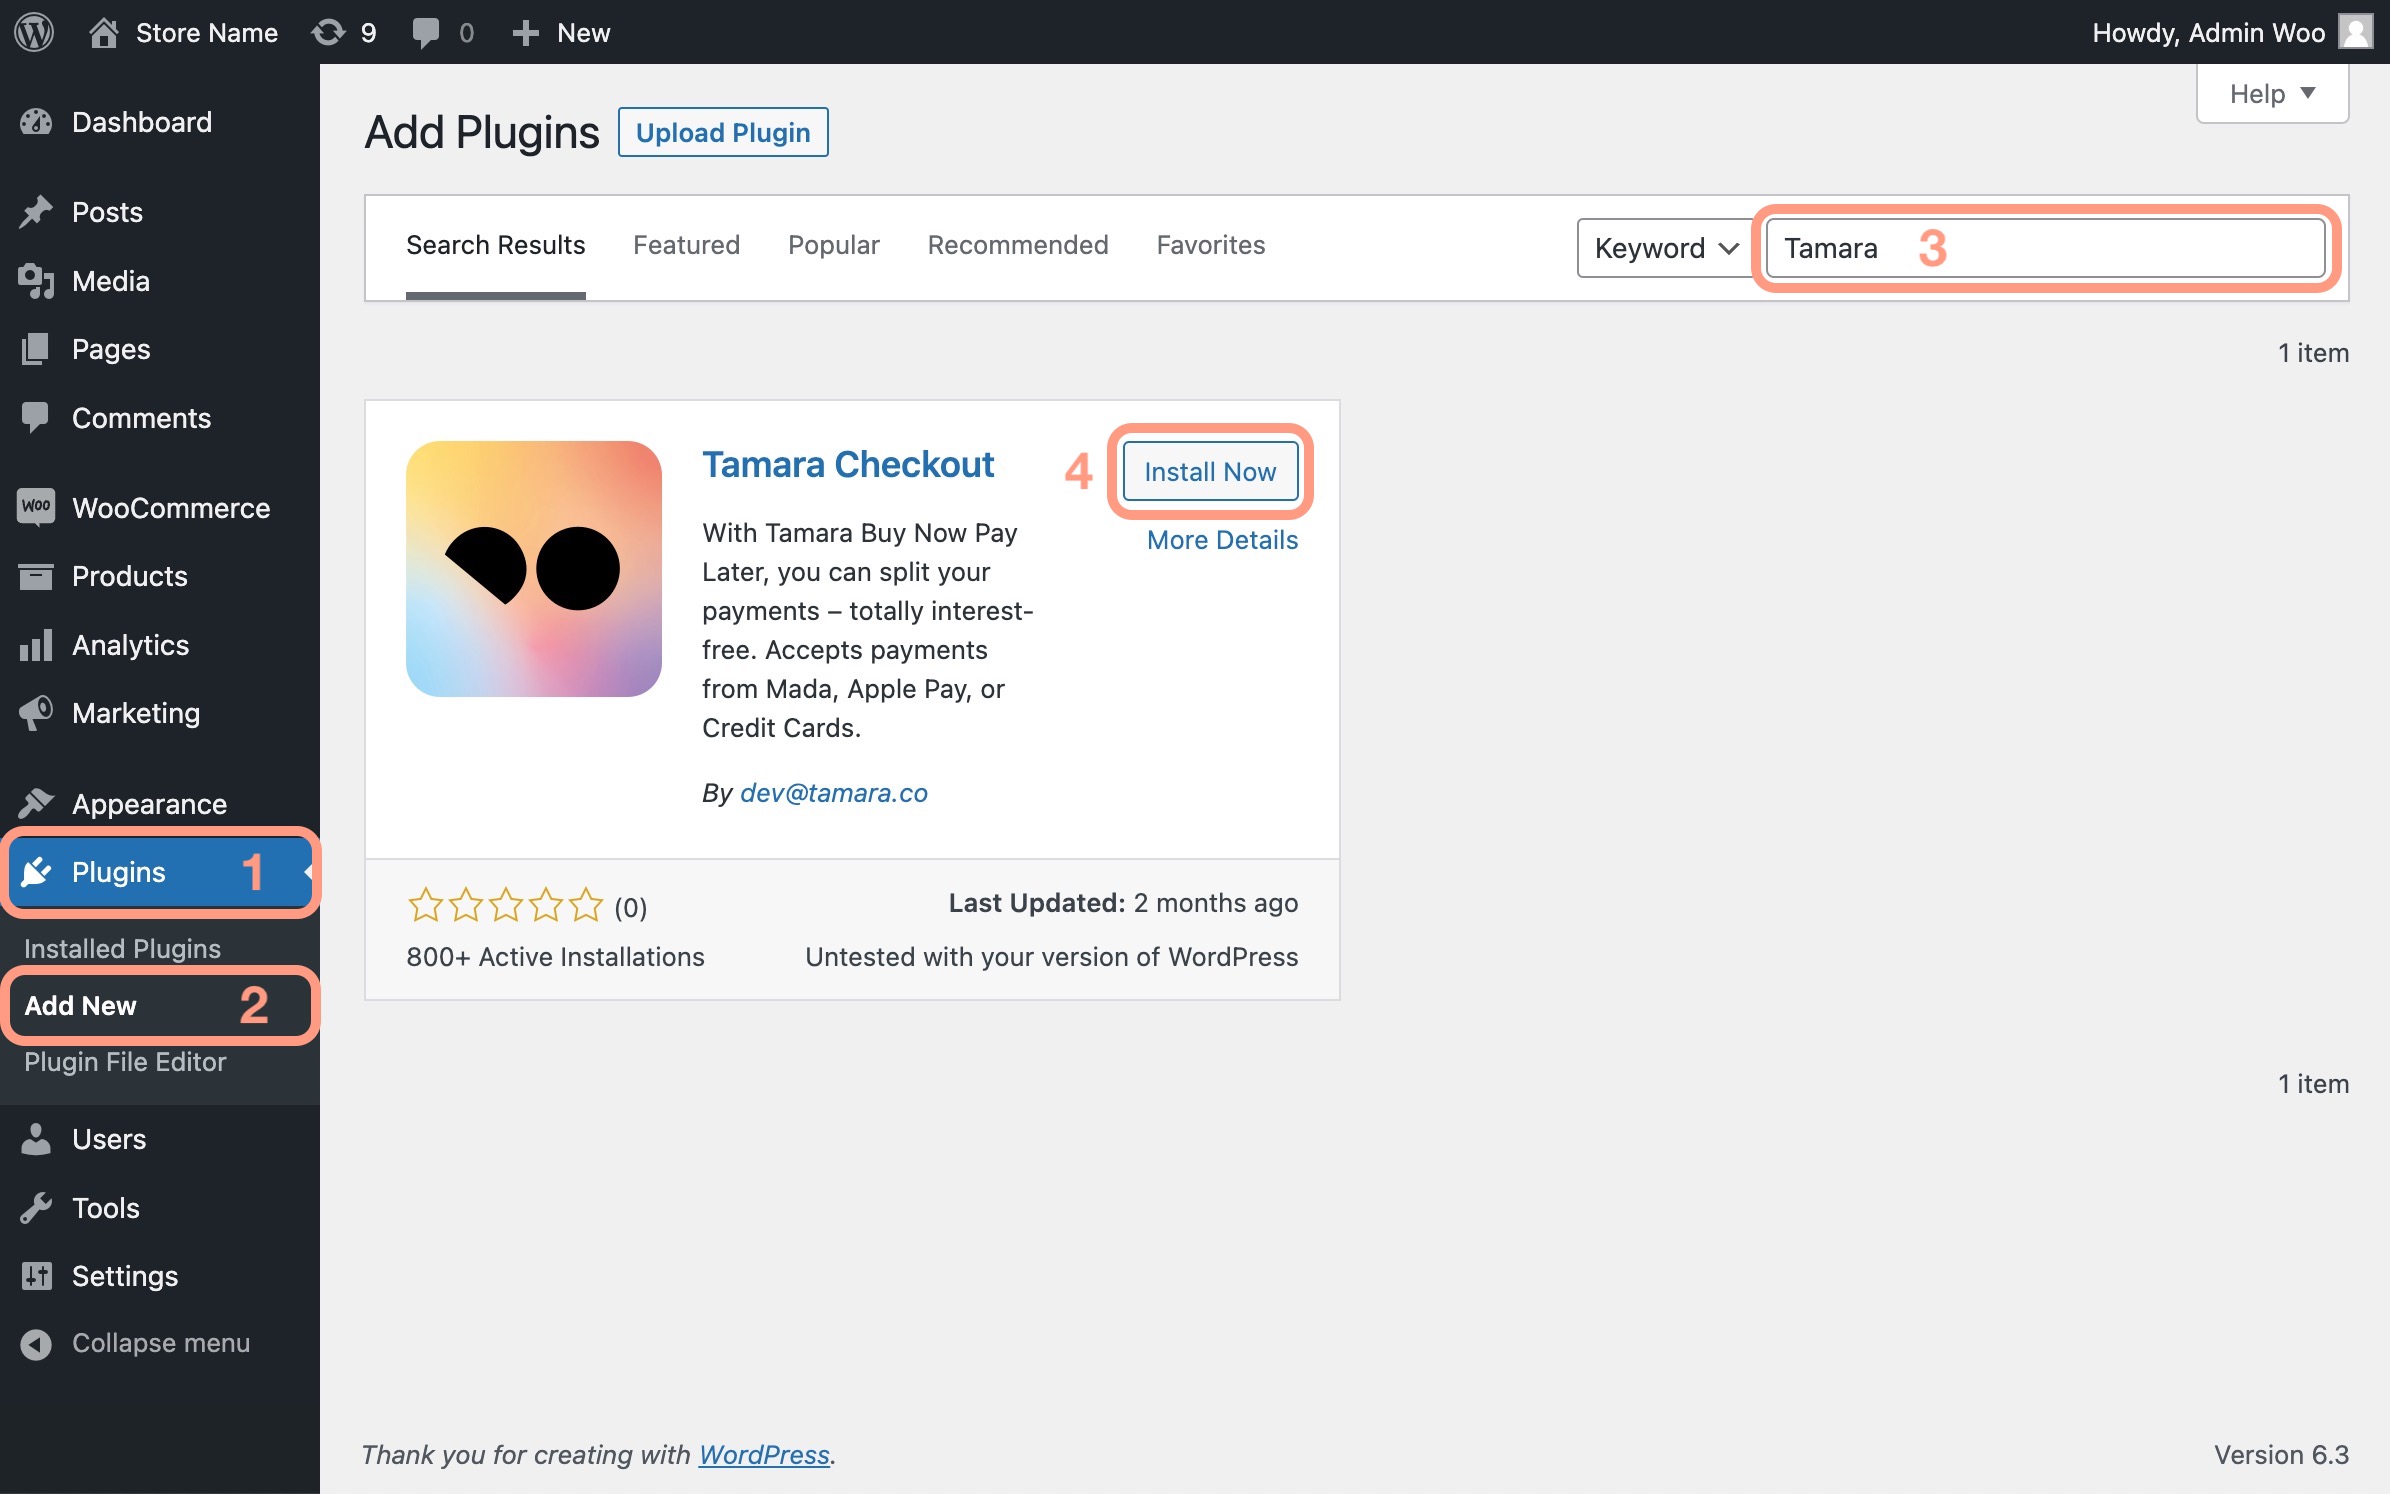
Click on 1. Plugins > 2. Add New > 3. Search for Keyword Tamara Checkout > 4. Click on Install Now
Manual Installation
1. Download the plugin
Wordpress - Tamara WooCommerce plugin
2. Upload the plugin
Click on Plugins > Add New > Upload plugin > Select the downloaded plugin package
You may also extract the downloaded package, then copy all the files and directories in the plugin and place it on your website root folder wp-content/plugins
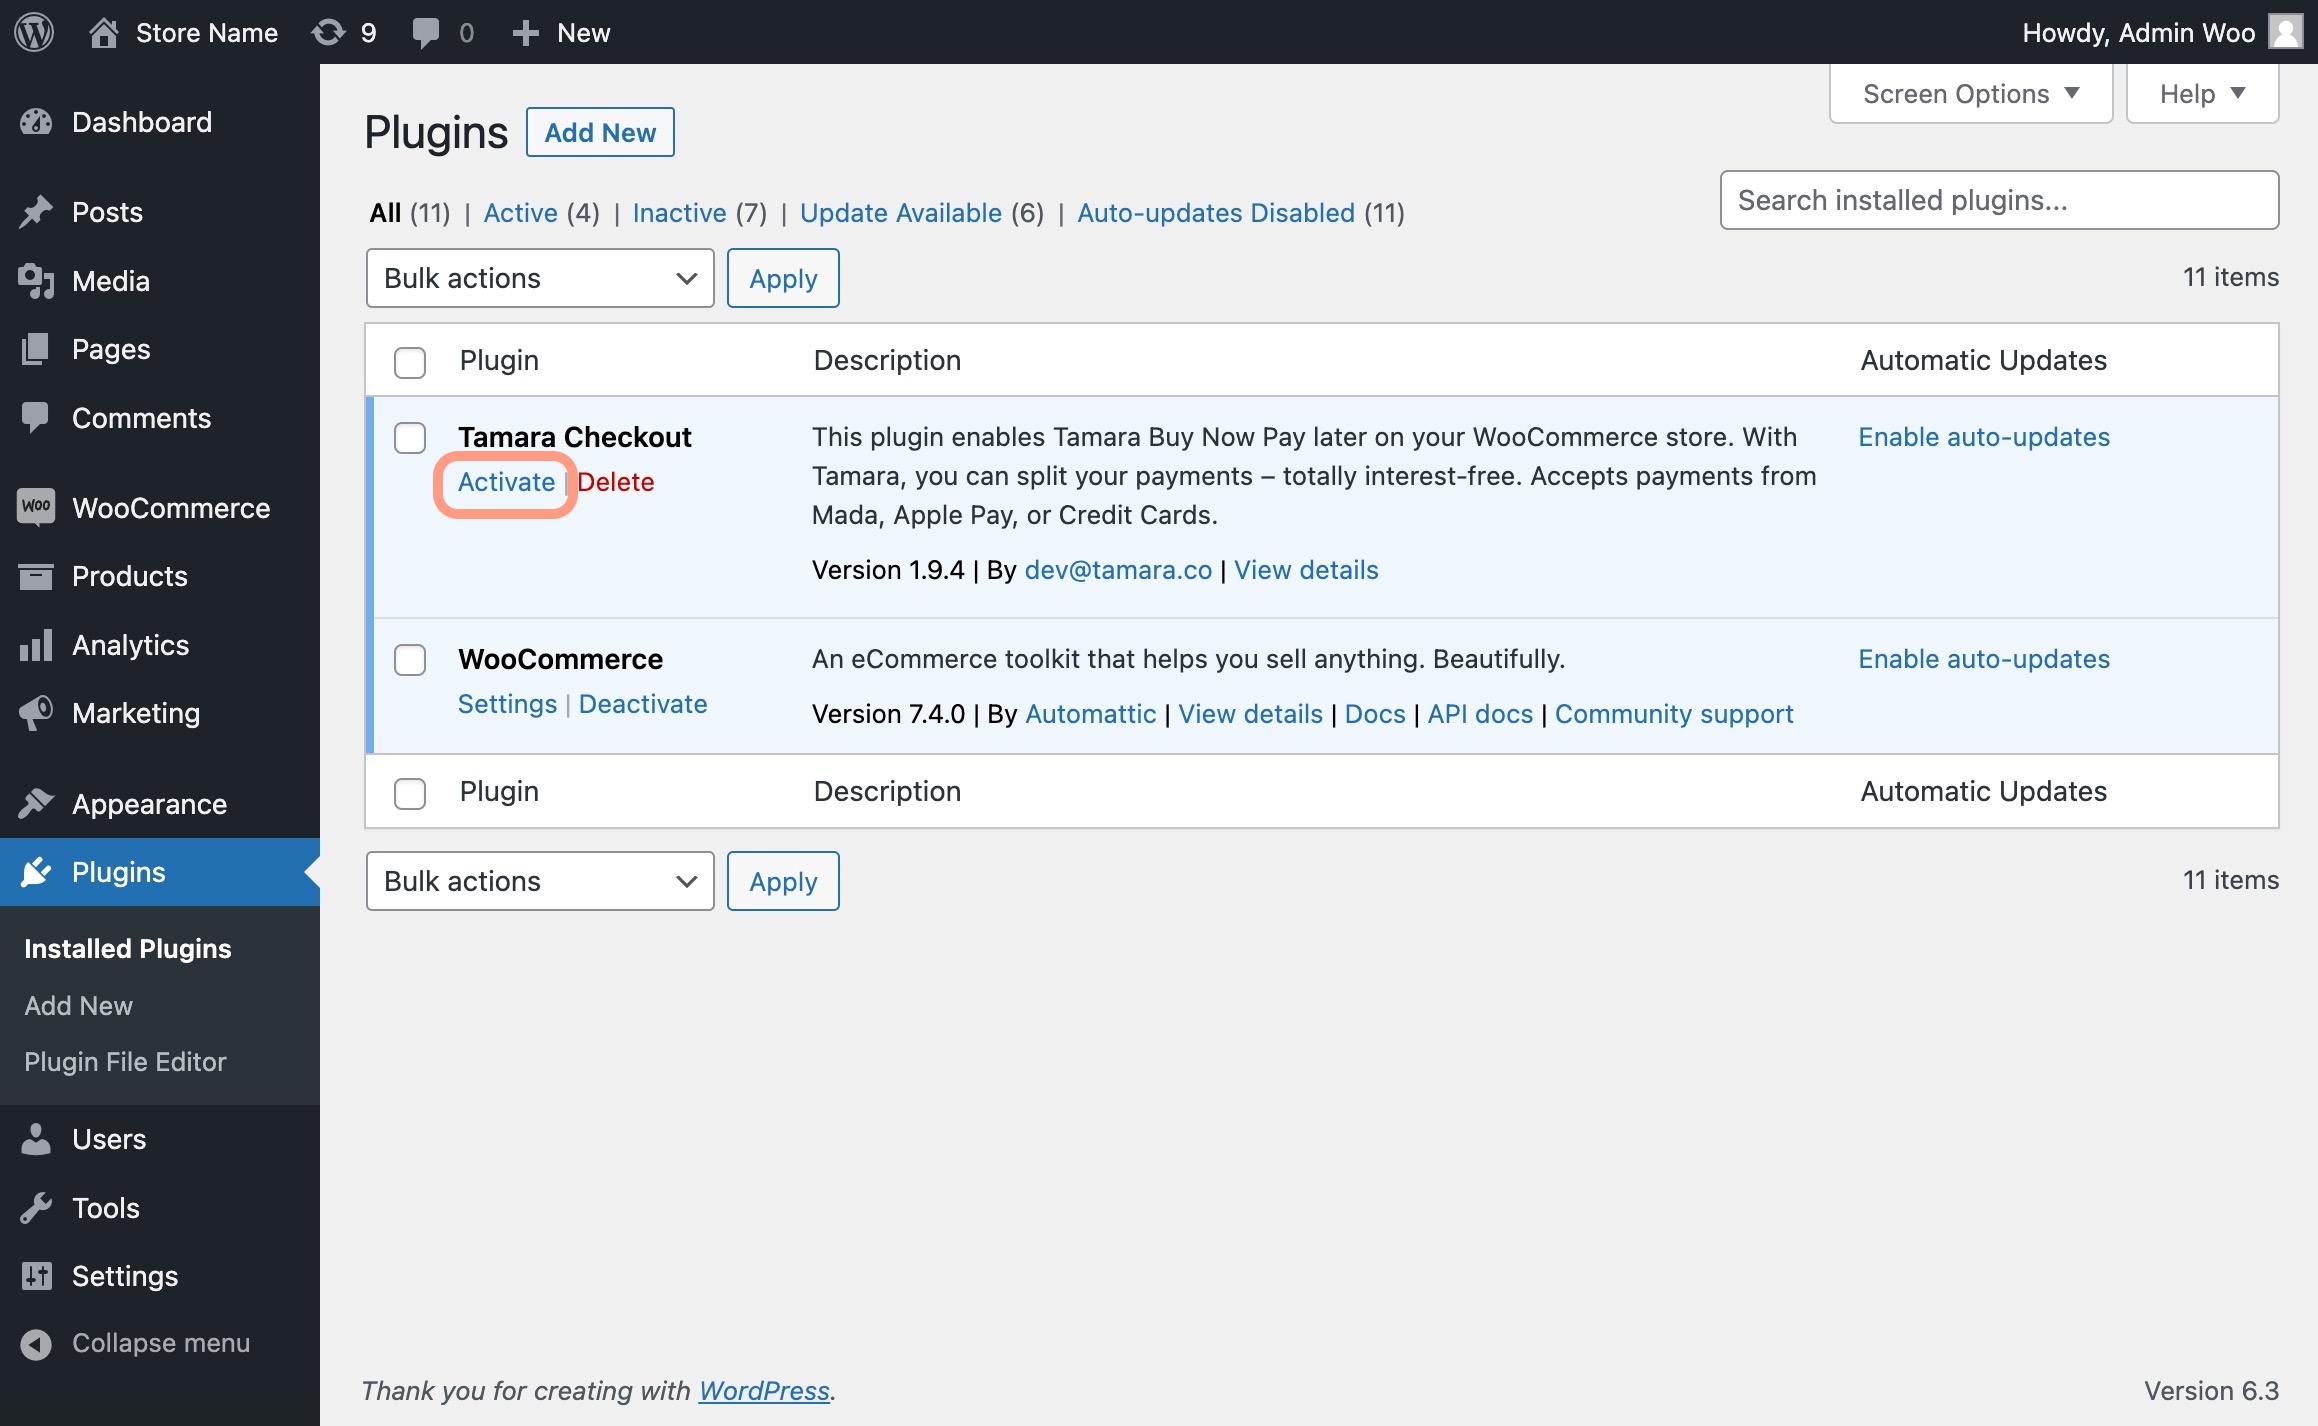
3. Activate the plugin
Once the files and directories have been placed into the WordPress plugins folder, or the plugin has been downloaded from the Dashboard:
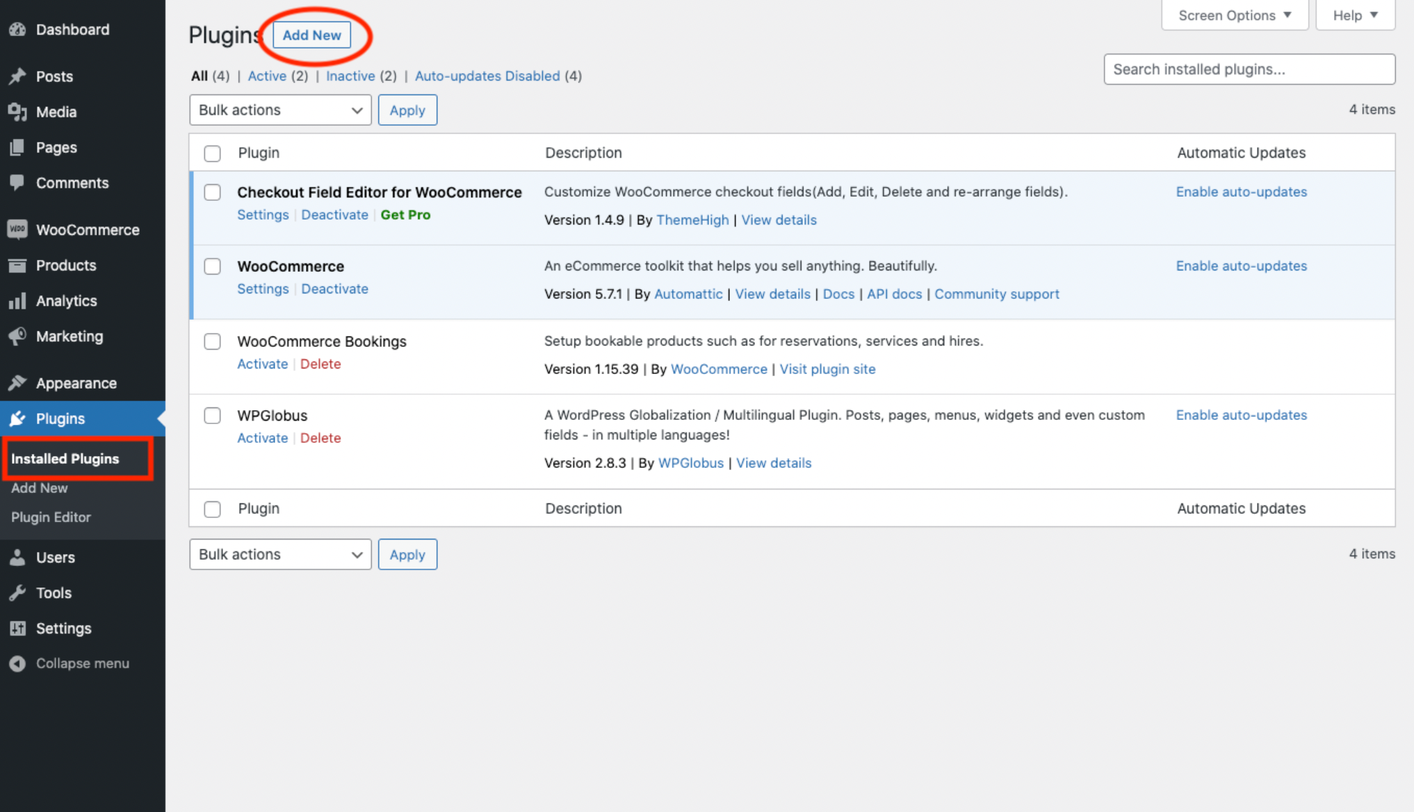
Click on Plugins > Tamara Checkout > Activate
4. Installation Complete
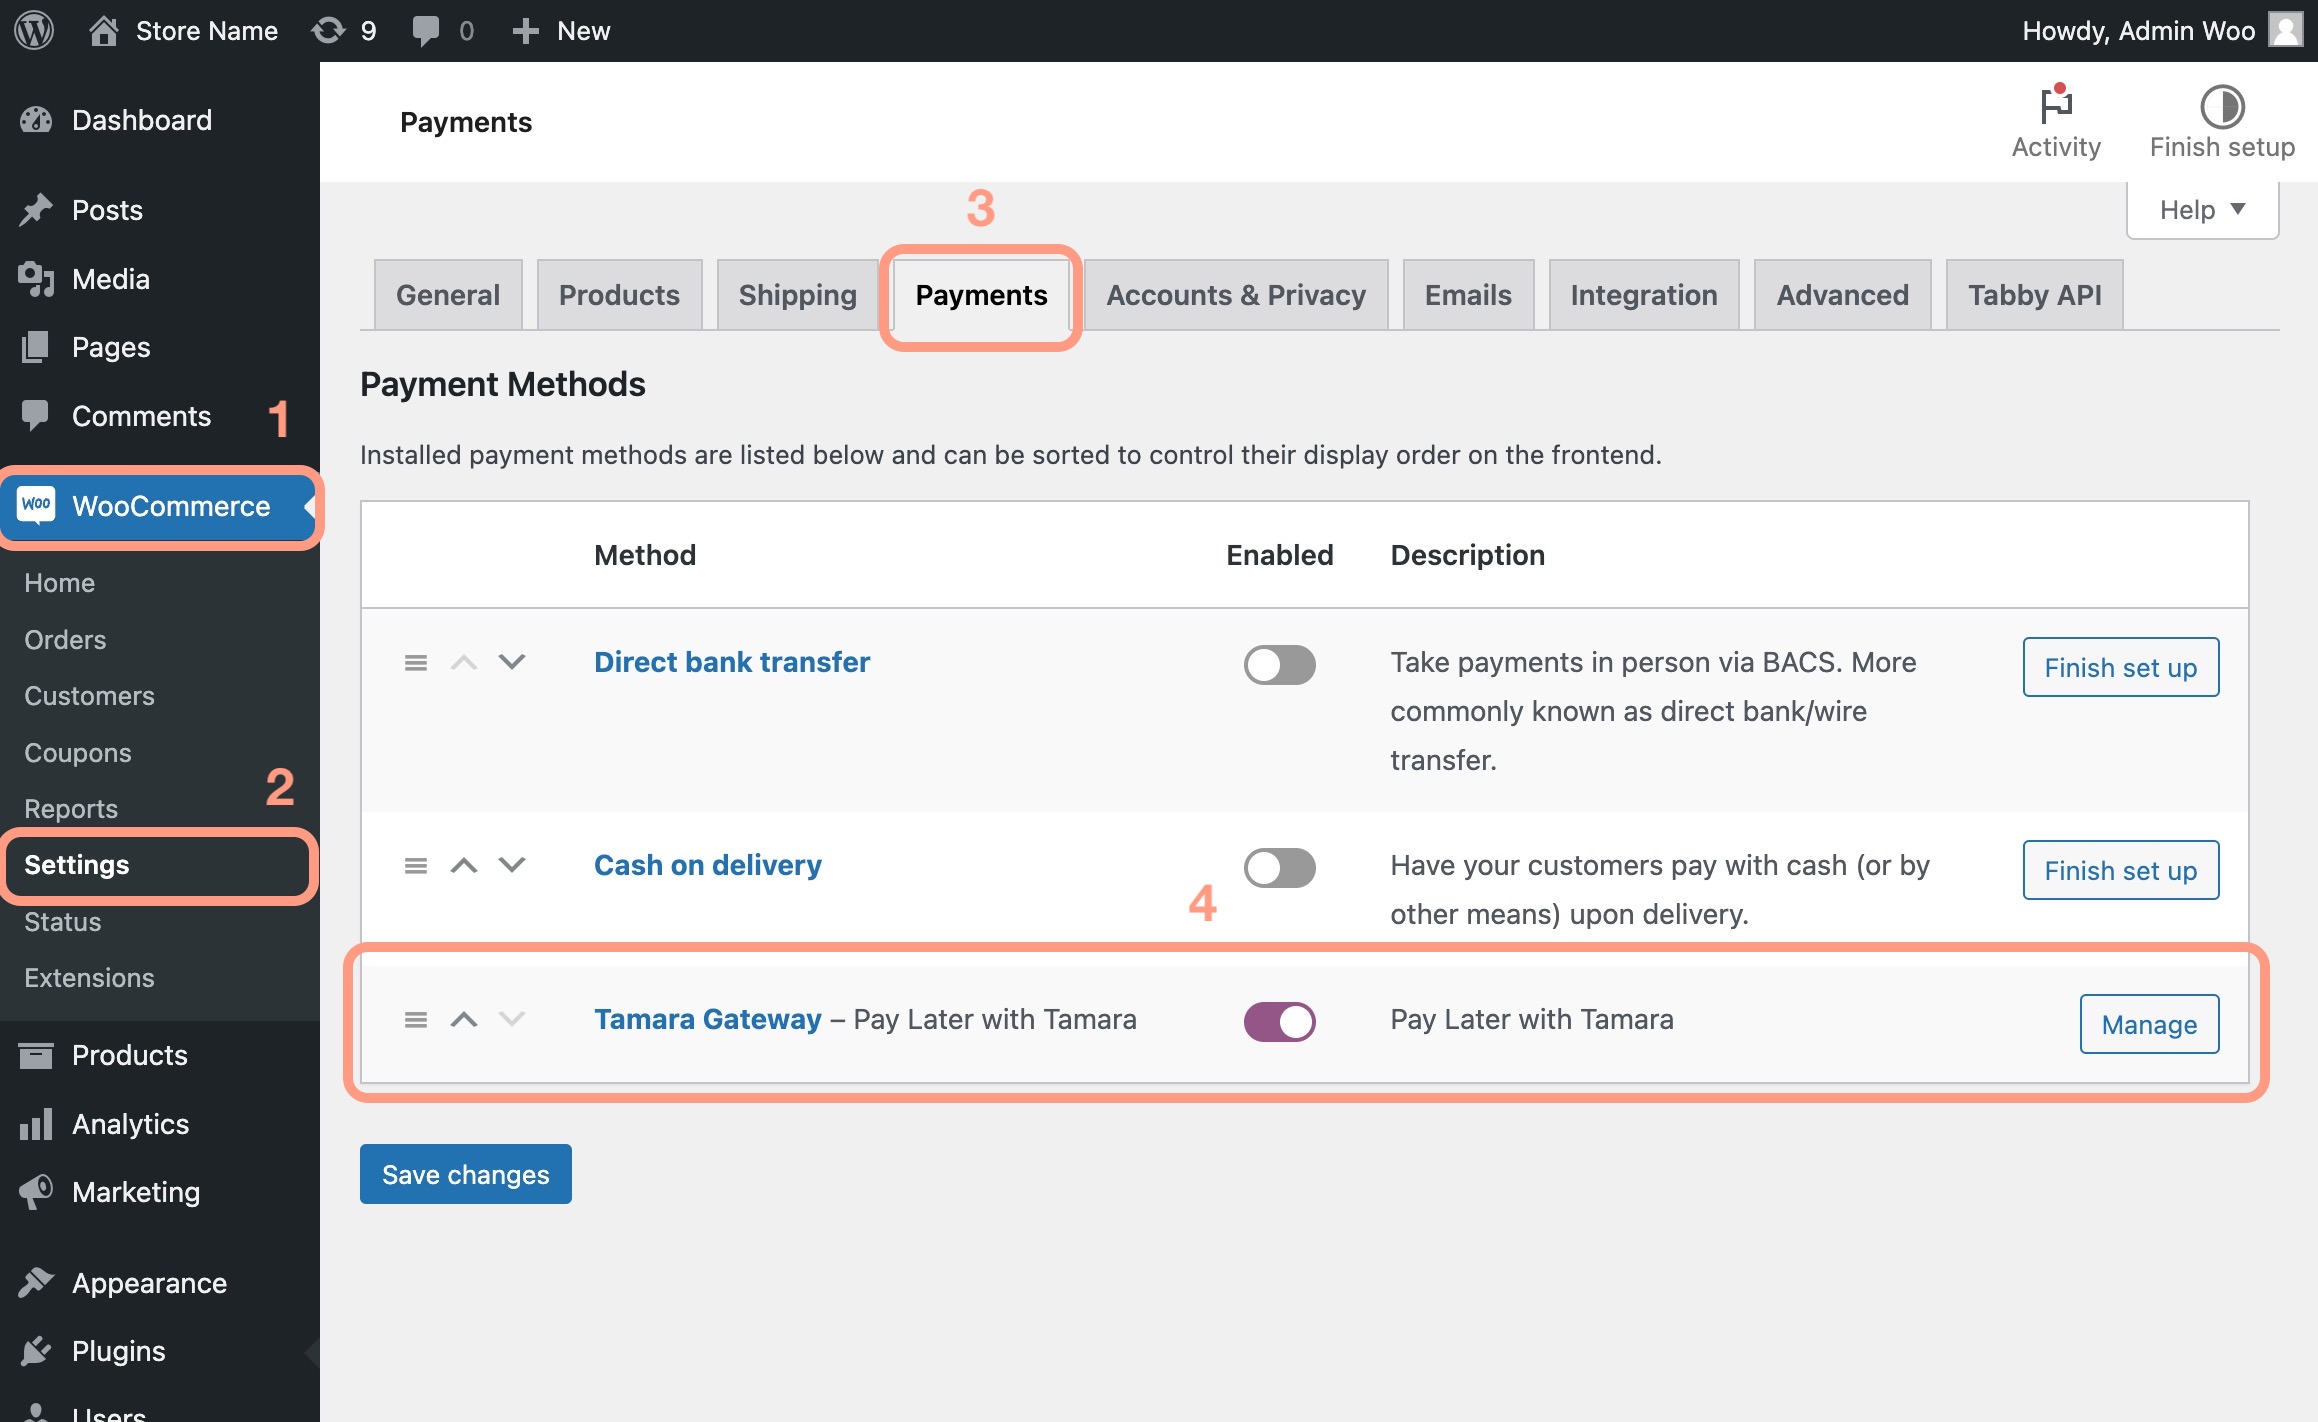
Once the plugin has been activated, 4. Tamara Gateway will be displayed under 1. WooCommerce > 2. Settings > 3. Payments
5. Configuration
You must configure the plugin to use itIn order to start enabling Tamara as a payment method on your WooCommerce store, you will need to configure the plugin.
Updated 4 months ago