Configuration
Create Webhook
On your Shopify Admin Store, Click on Settings > "Notifications" > Scroll down > Webhooks

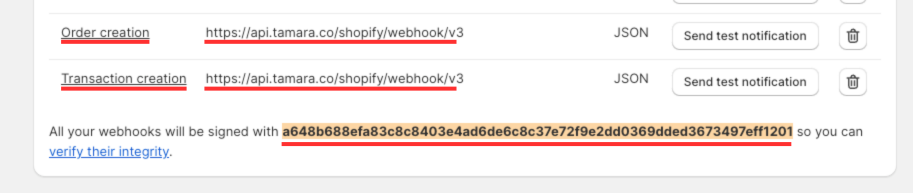
Click on "Create webhook" and create with 2 Events (Order Creation & Transaction Creation)
- Select the Event.
- URL is https://api.tamara.co/shopify/webhook/v3
- Webhook API Version is '2026-04'
Copy the Webhook Key (It is a yellow box with the bold) to use it in the next step.
Configuration
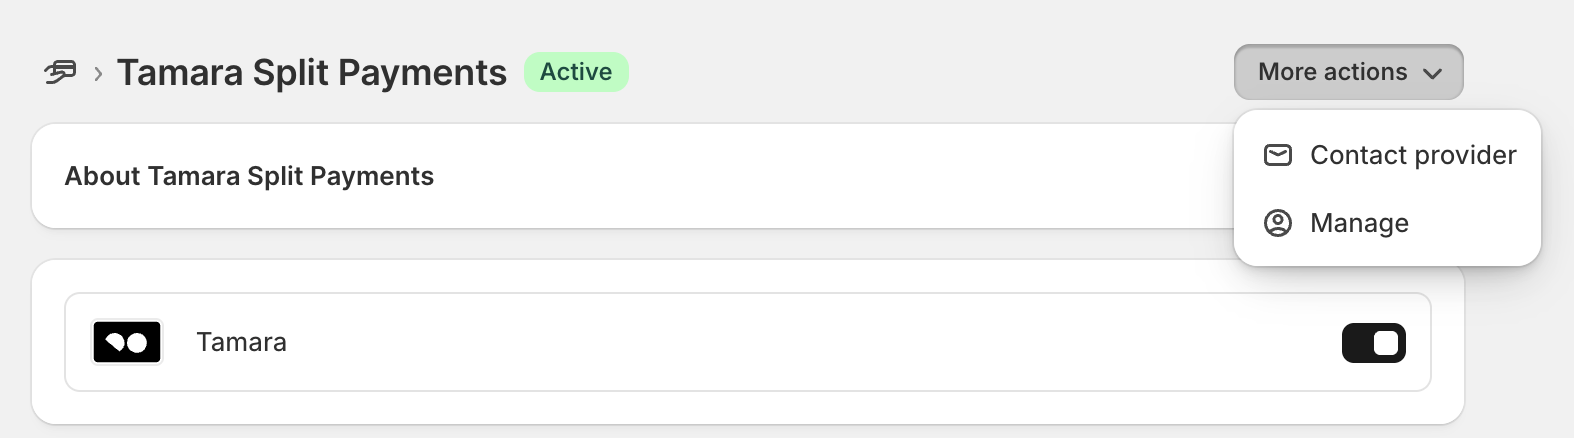
- Click on Settings > Payments > Additional payment methods > 'Tamara Split Payments'.
- On 'More actions' dropdown, choose 'Manage'
- Input 'Public Key' (you should receive it from Tamara). Please note that it should be used for 1 store only, if you have multiple stores, please let us know.
- Input 'Webhook Key' as in a previous step

Click Save and you're done.
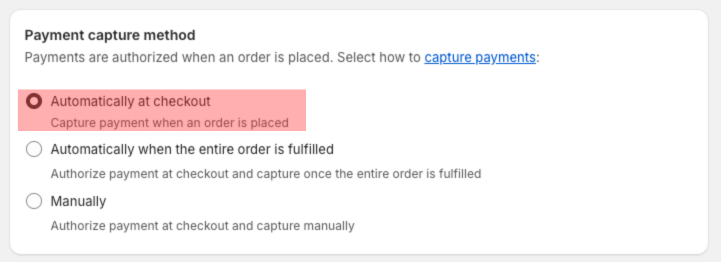
- Click on Settings > Payments and check "Payment capture method", and choose option "Automatically at checkout"
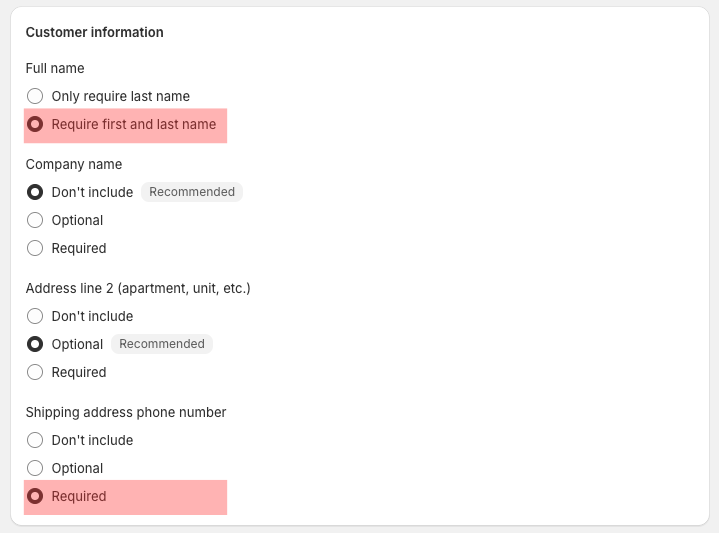
- Click on Settings > Checkout and check "Customer information"
Tamara payment app is now working on your store⭐️⭐️⭐️⭐️⭐️ Please don't forget to rate our application on the Shopify App Store