ExpandCart
This plugin can be used to add Tamara as a payment gateway for your ExpandCart store.

Prerequisites
- The store's default currency should be SAR or AED.
- The customer must fulfill the below criteria:
- Choose KSA or UAE as the country of destination
- Use a KSA or UAE phone number
- Select SAR or AED as the currency for the order
Installation
-
Login into your ExpandCart Admin Panel
-
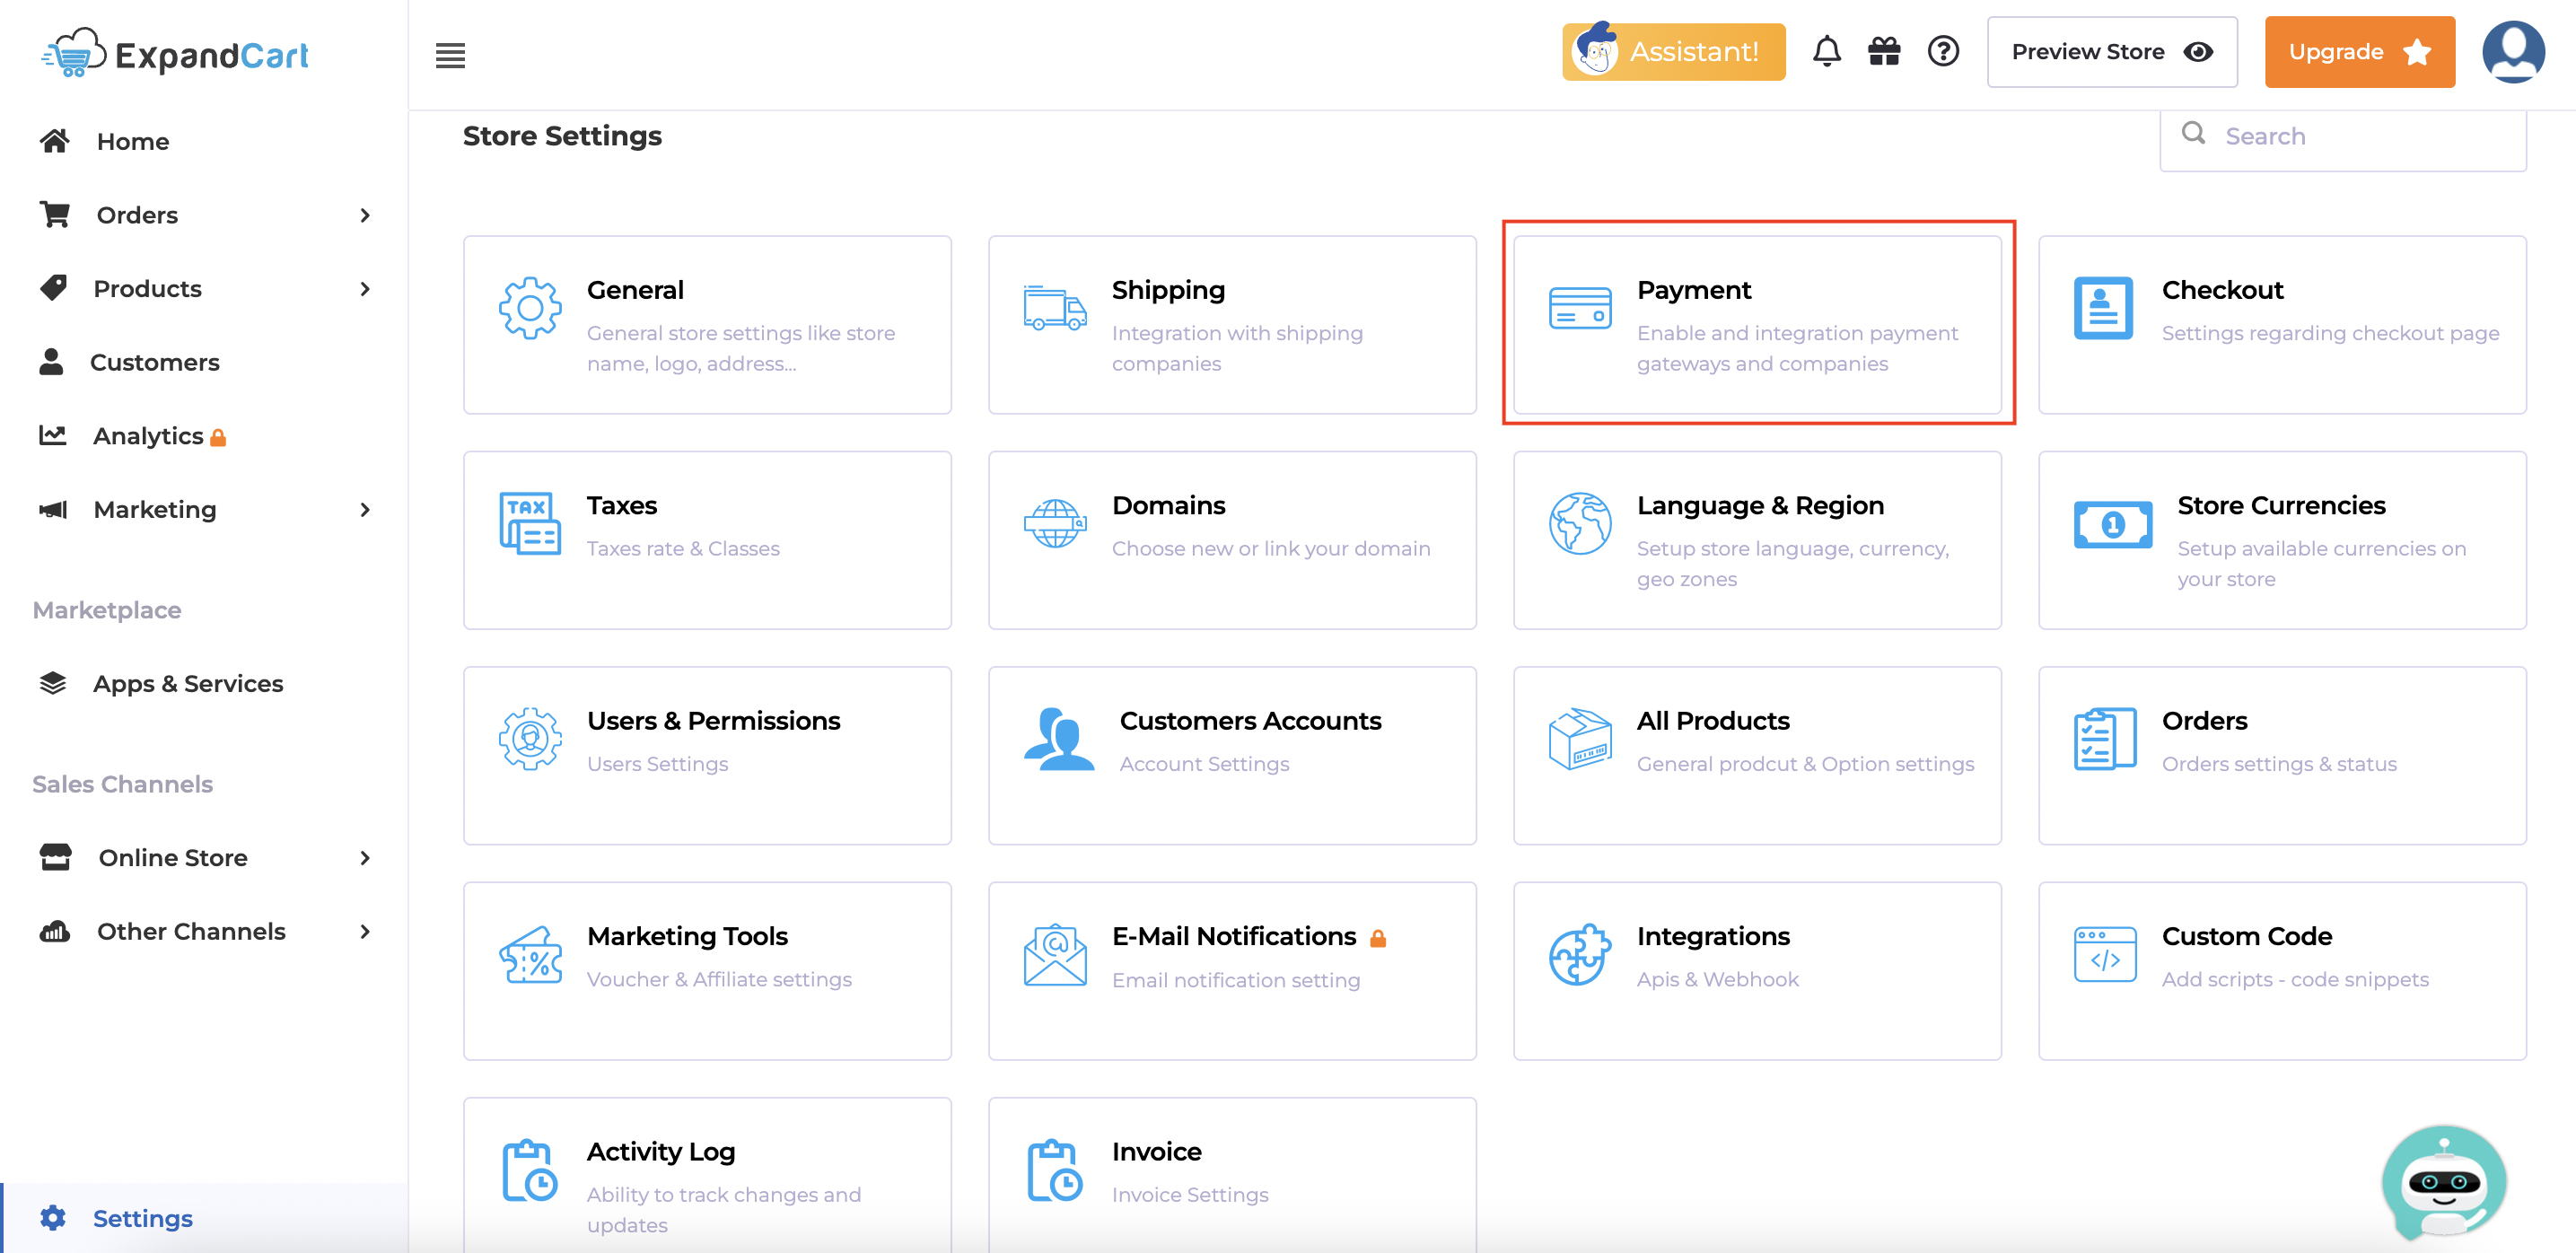
Click on Settings > Payment
-
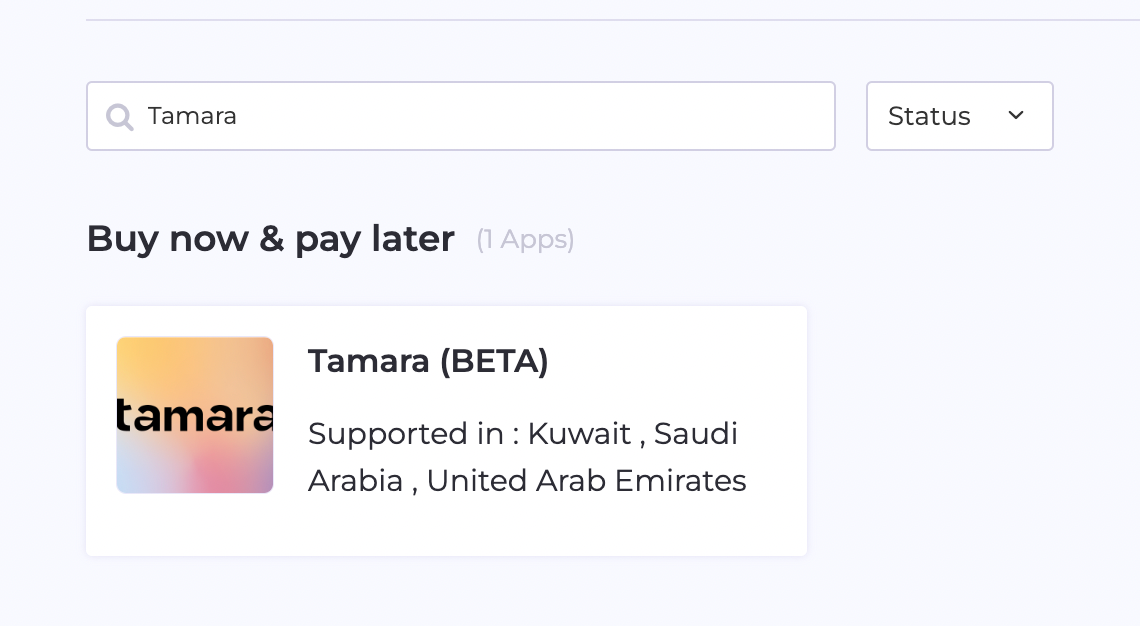
Search for Tamara on the search bar > Click on Tamara app icon.
-
Click on
Get started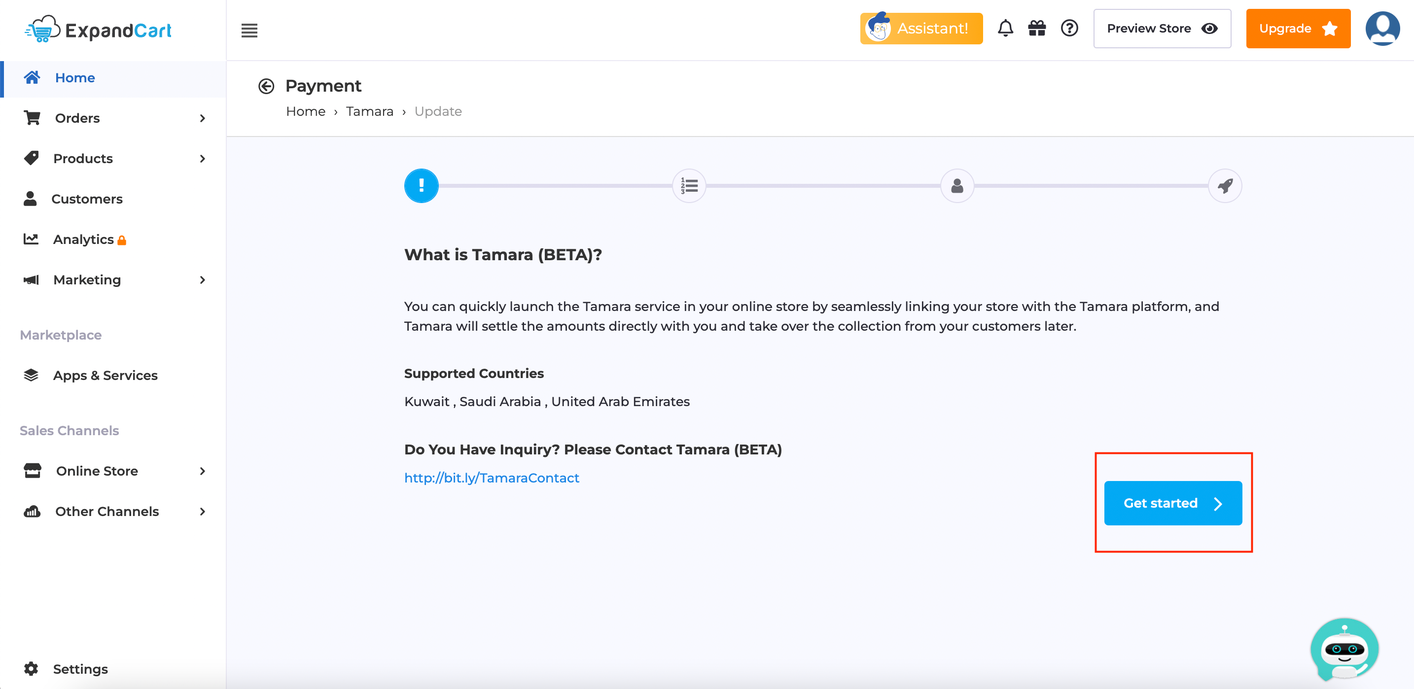
-
Click on
Proceed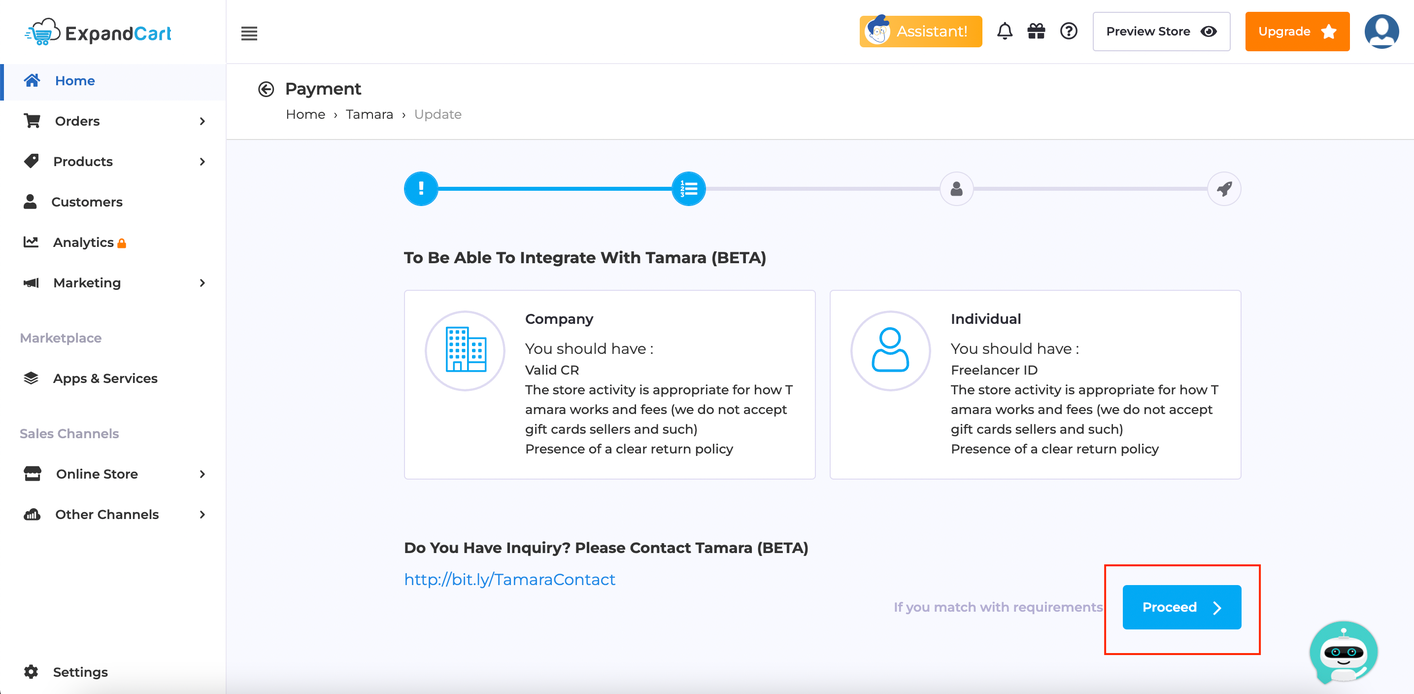
-
This stage will need for you to make a choice,
-
Choose
No, I Don’t Have
If you DON'T have an existing Tamara account. -
Choose
Yes, I Have Account
If you DO have an existing Tamara account.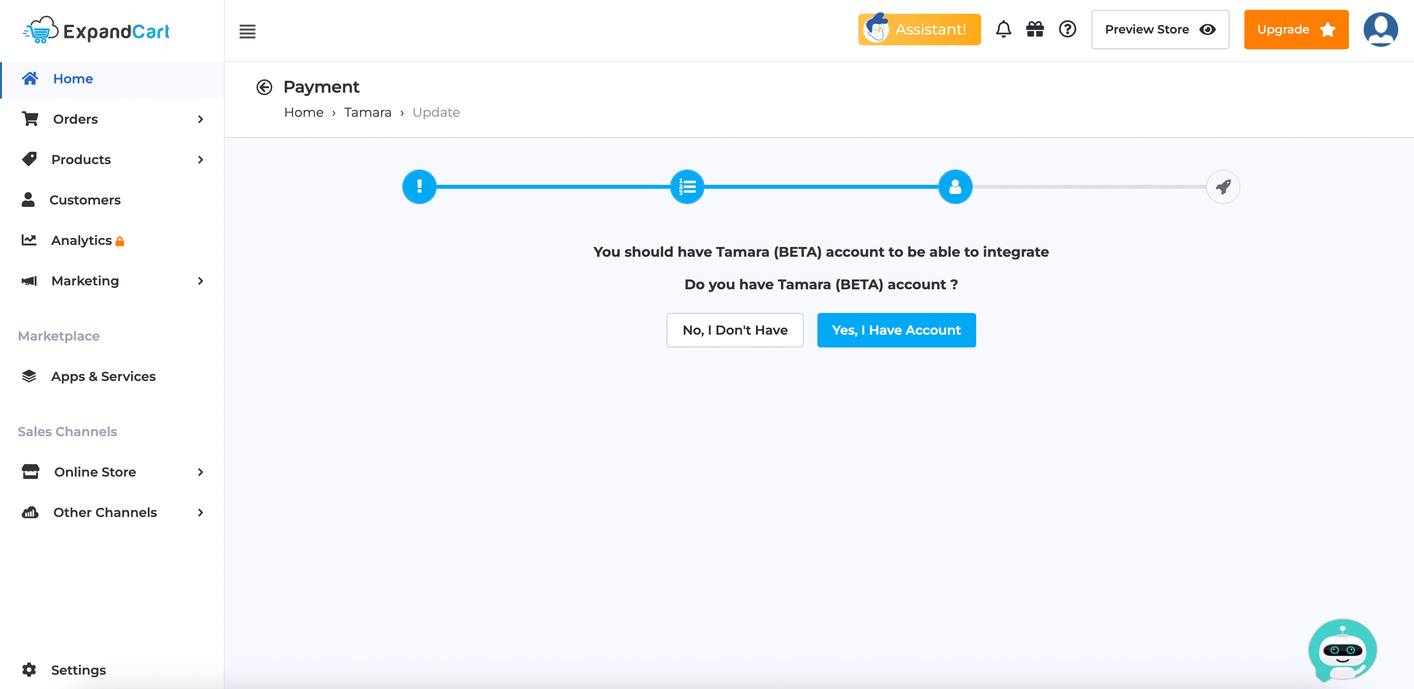
-
-
Enter your Tamara credentials at this stage
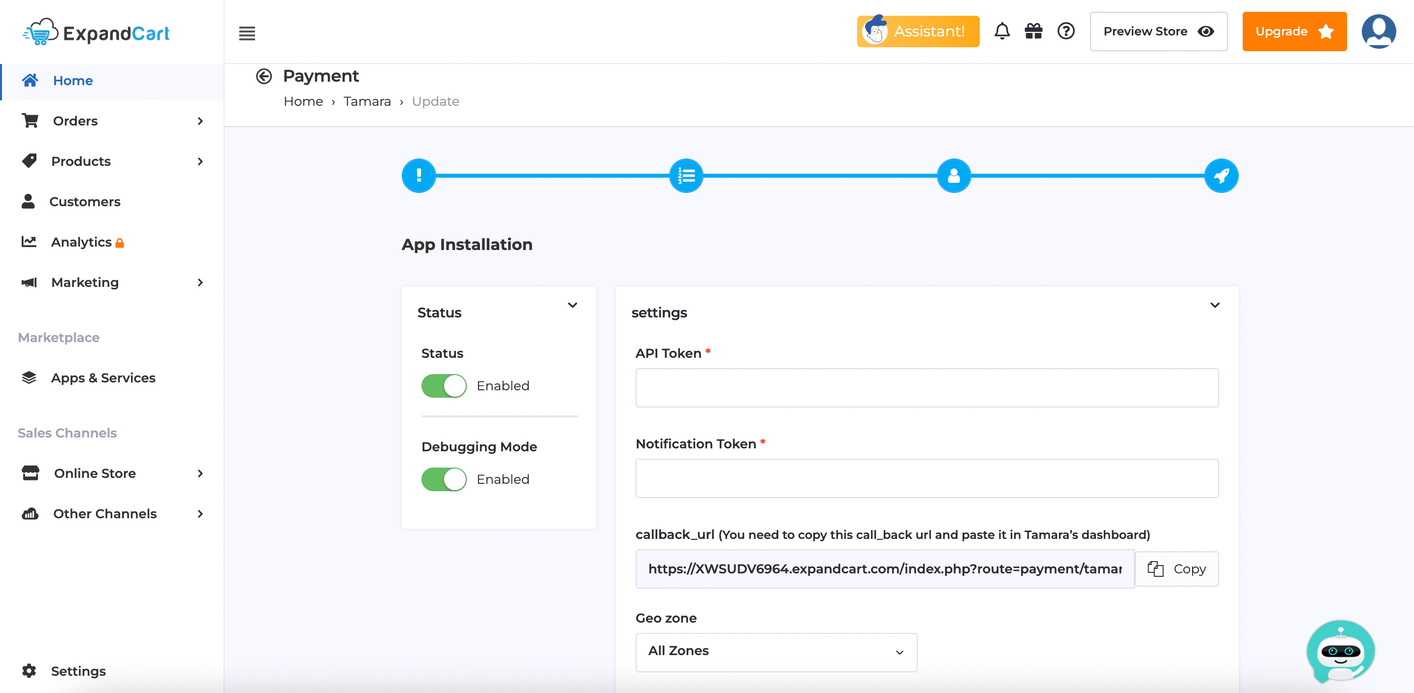
- API Token: Your merchant token provided by Tamara.
- Notification Token: Your notification token provided by Tamara.
- callback_url: This will be displayed as default and uneditable. It is used to receive response data from Tamara.
- Geo zone: The shipping zones that are allowed to use Tamara. A Geo zone can be a city/cities, country/countries, or a combination of them. For e.g., you can create a geo zone that includes Saudi and UAE and choose it for Tamara payments. More details on how to set the Geo zone, are available here.
- Status: Enabled.
- **Debugging Mode:**Enabled ONLY when working on Sandbox mode.
Tamara Order Statuses Mapping

ImportantIt's recommended to click on the Add button to add all Tamara statuses, so that it is automatically synced, otherwise automatic in-store tracking will be disabled.
- New: New order created before processing the payment with Tamara.
- Approved: Order status when checkout is a success (after the redirect): The status that you want to set for the order if the payment is successful with Tamara.
- Authorized: The status that you want to set for the order after it is authorized.
- Canceled: The status that you want to set to trigger a Cancel event to Tamara to cancel the payment if you want to cancel the order. This should occur before the Capture event.
- Captured: The status that you want to set to trigger the Capture event to Tamara.
- Refunded: The status that you want to set to trigger the Refund event to Tamara. This should be triggered after the order has been captured.
Plugin Activation

Click on Install App and then Tamara will be activated for all your customers as a payment option on your store checkout page
That’s it! Tamara is now ready for customers to use with your store.